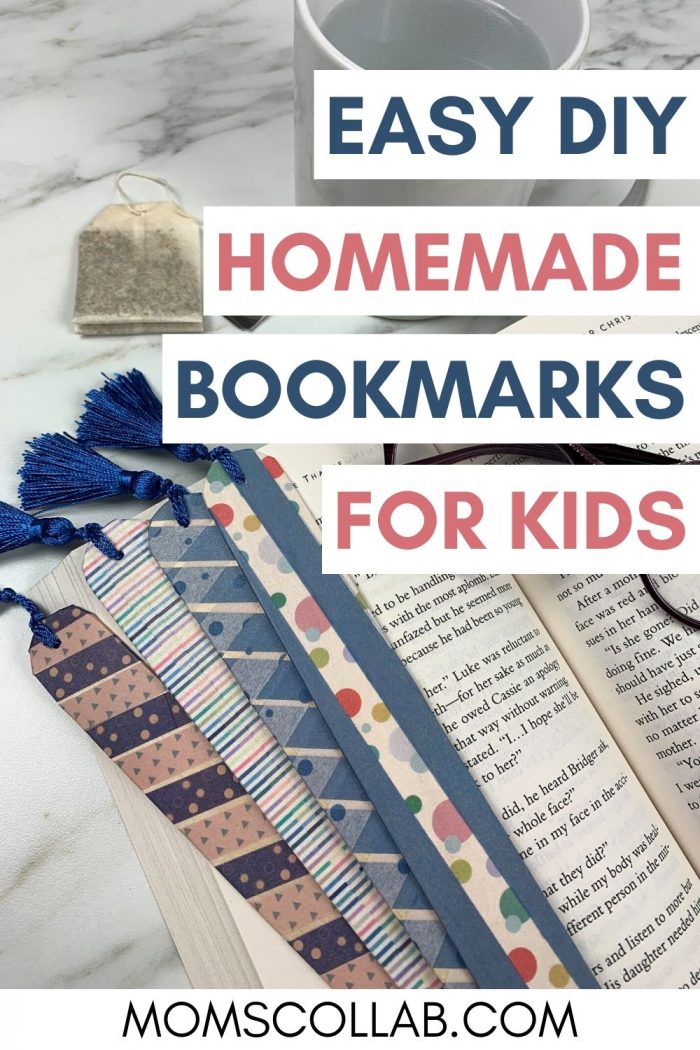
4 Easy Steps to Create Bookmarks for Gifts and Personal Use
This post may contain affiliate links. Please see my full disclosure policy for details.
Learning to make your very own DIY bookmarks doesn’t have to be overly difficult. With just a few simple supplies and this step-by-step tutorial, you’ll be marking your pages with ease every time you have to pause in your blissful reading. (Because who really likes bending down the pages of your book to hold your spot?!)
I love a good book but what I love even more about a good book are nice clean pages that aren’t bent up or folded down. Call me crazy, but it’s true. Sometimes I buy my own books and then I don’t have to worry about bent pages but when I check them out from the library, the pages are all sorts of messed up!
This is why I’m adamant about using bookmarks to mark my spot. Because I’m just certain that there are others out there who feel the same way. Tell me I’m not alone in this?!
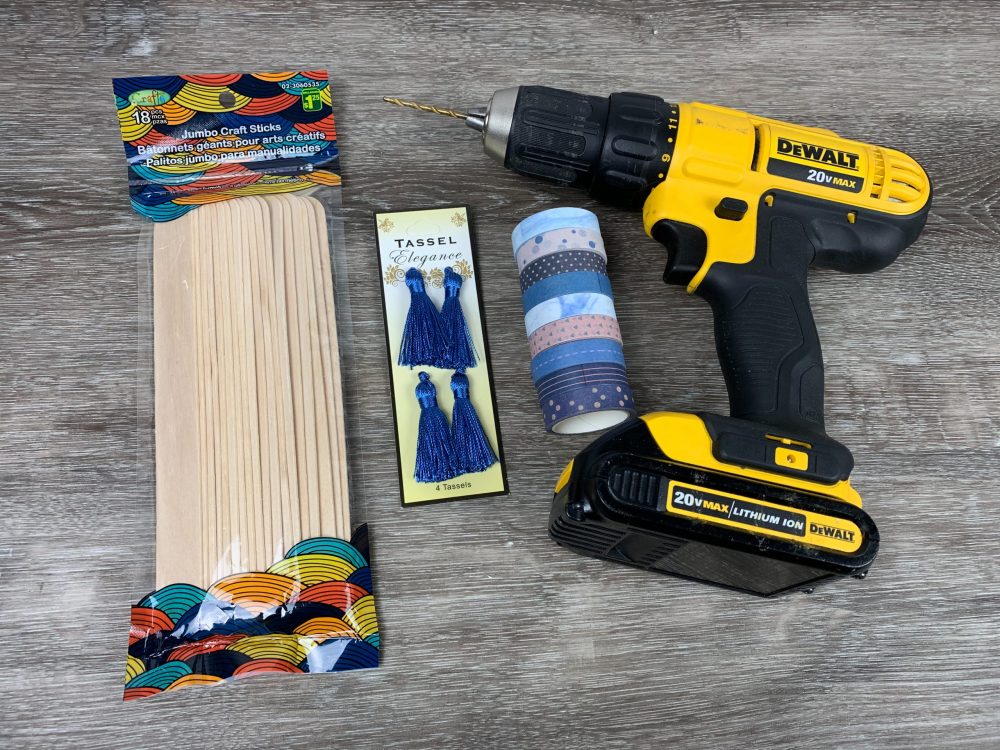
Materials Needed to Make DIY Bookmarks
Luckily, making homemade bookmarks is simple. In just a few moments of time, you’ll be happy with your efforts and outcome.
- Jumbo Craft sticks
- Drill
- Tassel
- Washi tape
- Drill bit
4 Easy Steps to Make Bookmarks with Jumbo Craft Sticks
What I love most about this DIY bookmark activity is that it’s easy for adults and kids to do. Who says you can’t have a family-fun bookmaking party right at your own table?
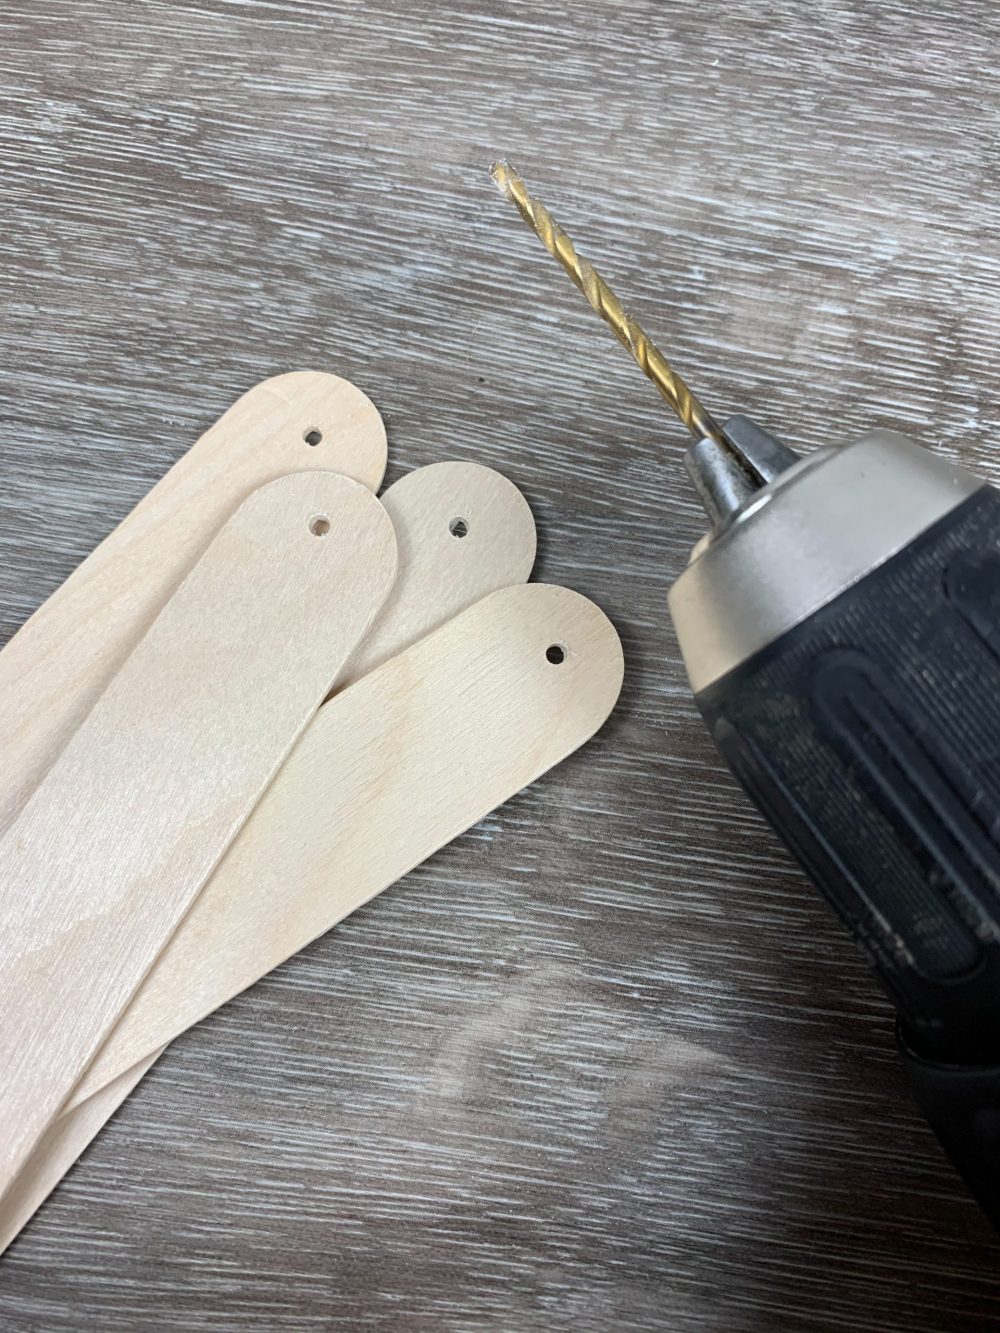
step 1: Drill a hole in your jumbo craft stick
To start creating your DIY bookmark, drill a hole in the jumbo craft stick. Do this carefully and make certain that it’s about ¼ ″ down from the very top edge of the craft stick.
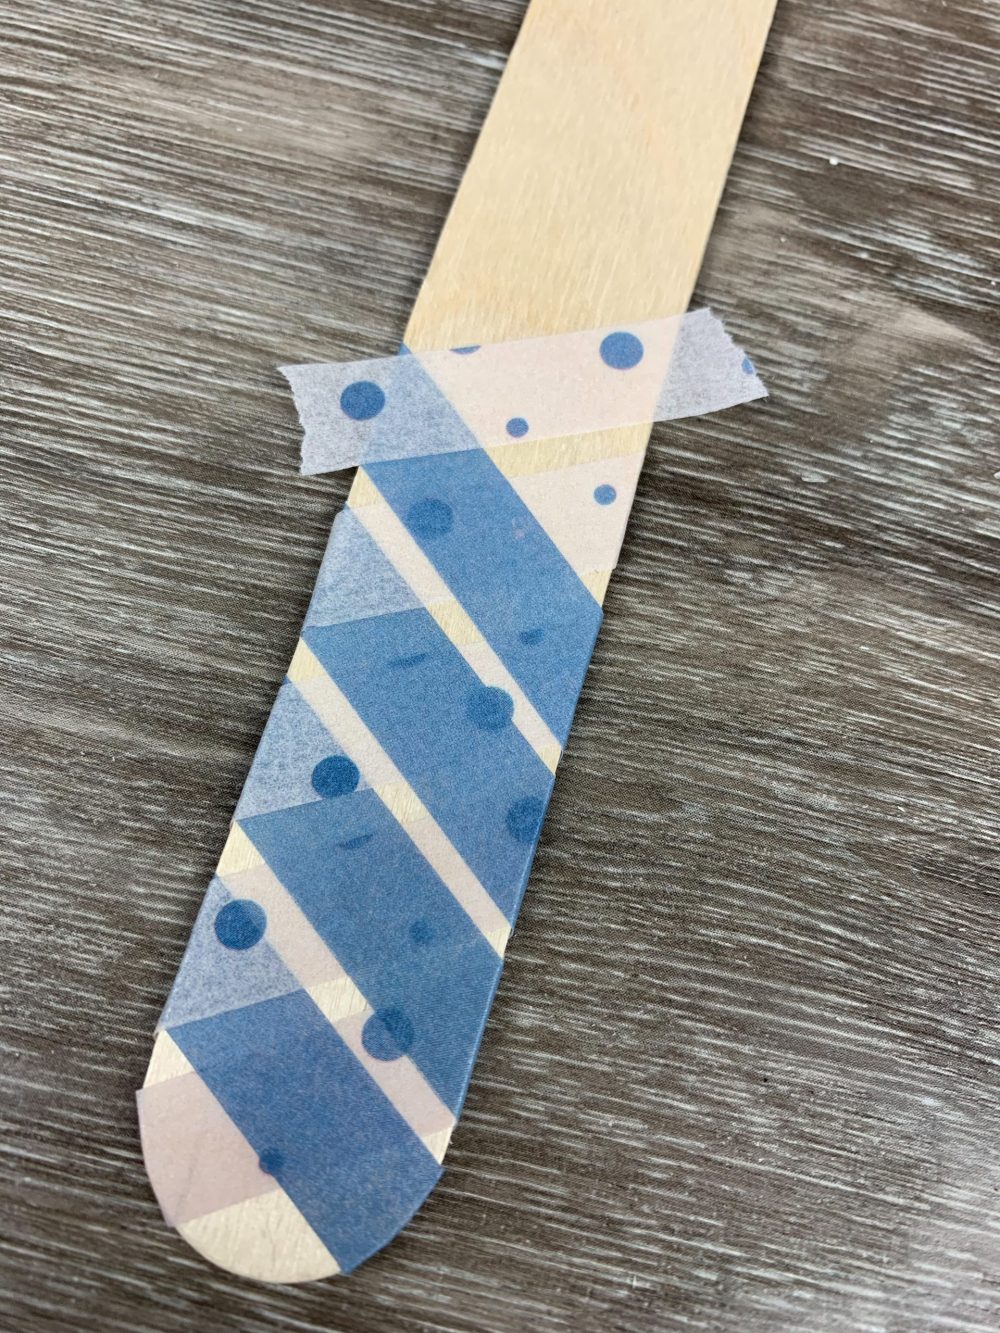
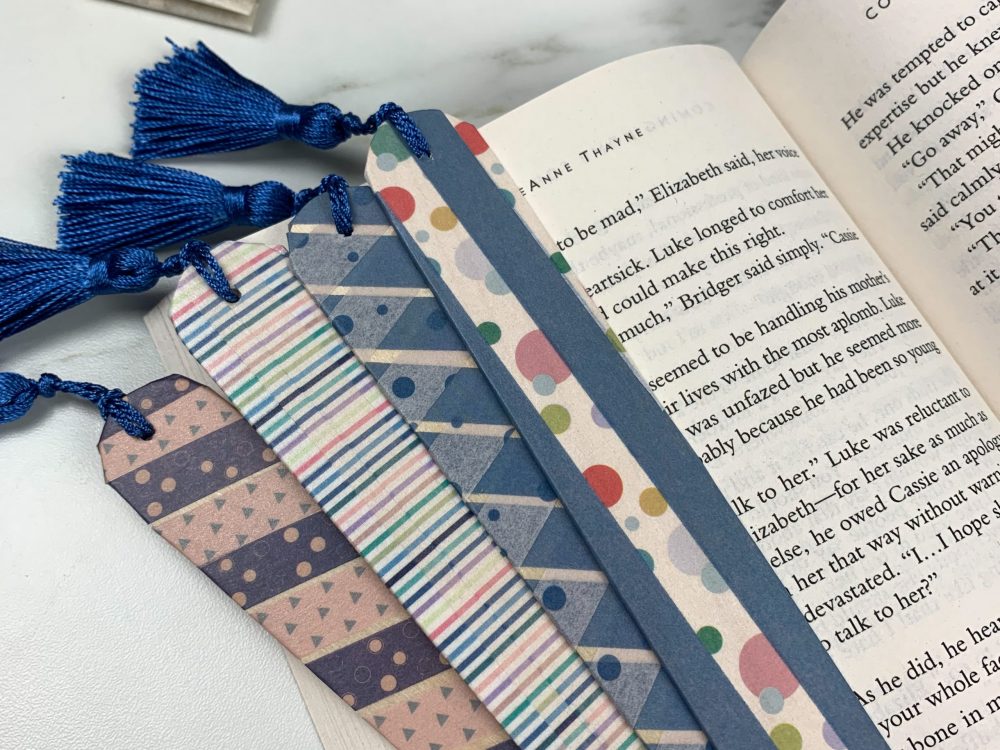
Step 2: Decorate using Washi Tape
This is where creativity happens. Using the Washi tape, decorate your craft stick any way that you want. Cross the patterns, mix ’em up, go up and then down. Have fun. It’s your bookmark to decorate however you please.
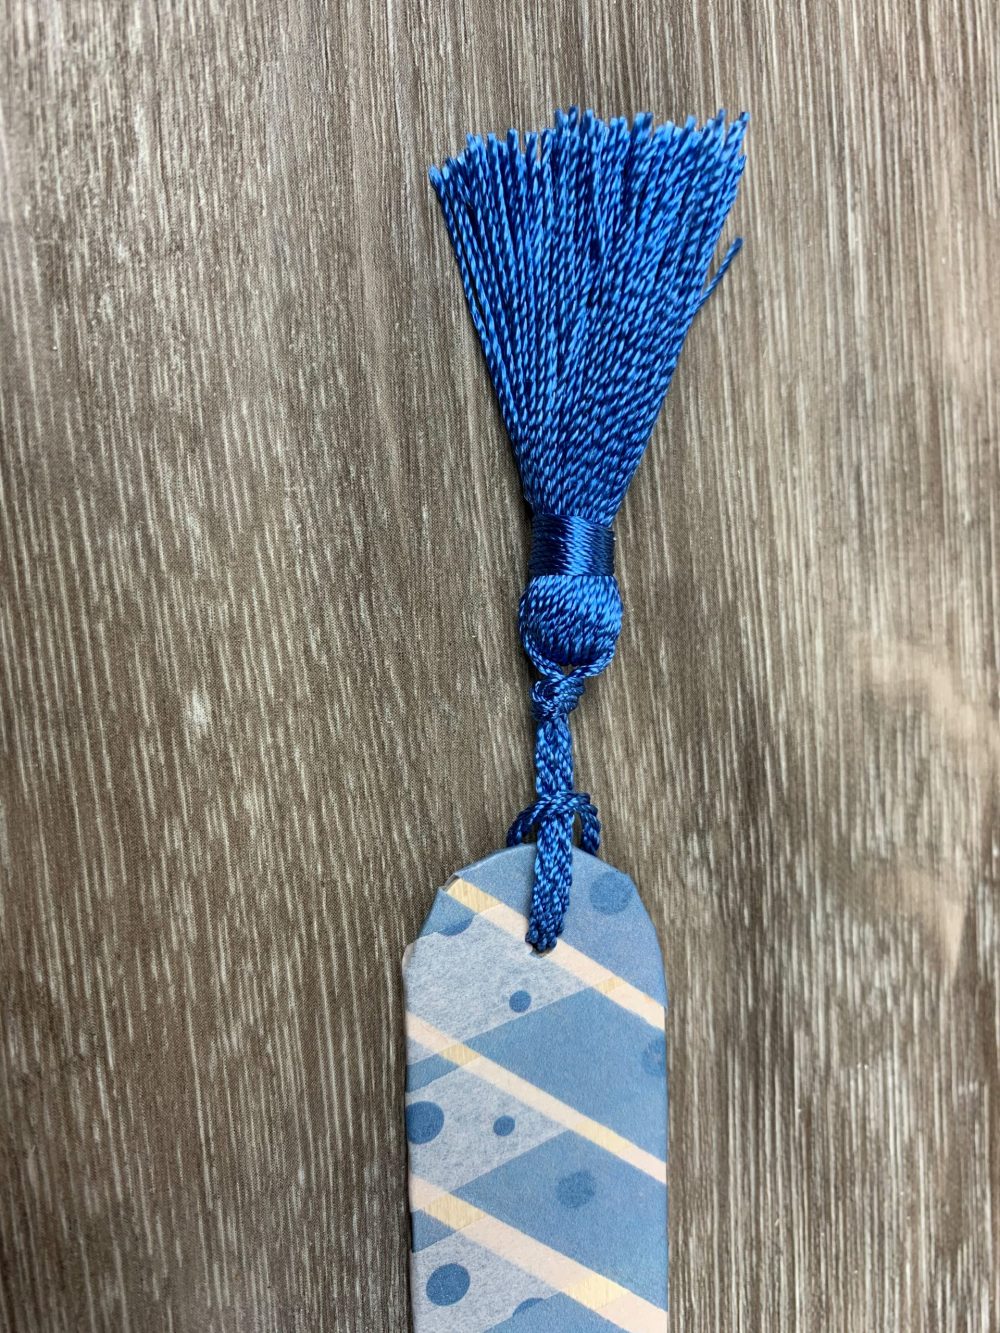
Step 3: Secure the tassel
Once the tape is on and you’re happy with the pattern, take your tassel and put it through the drilled hole and tie it so it doesn’t come loose or fall out.
Step 4: Repeat again and again
You’re probably not just reading one book right now, right? If so, that means that you’re going to need more than one bookmark for every book that you’re consuming.
Once you create one, do the same simple processes over and over again.
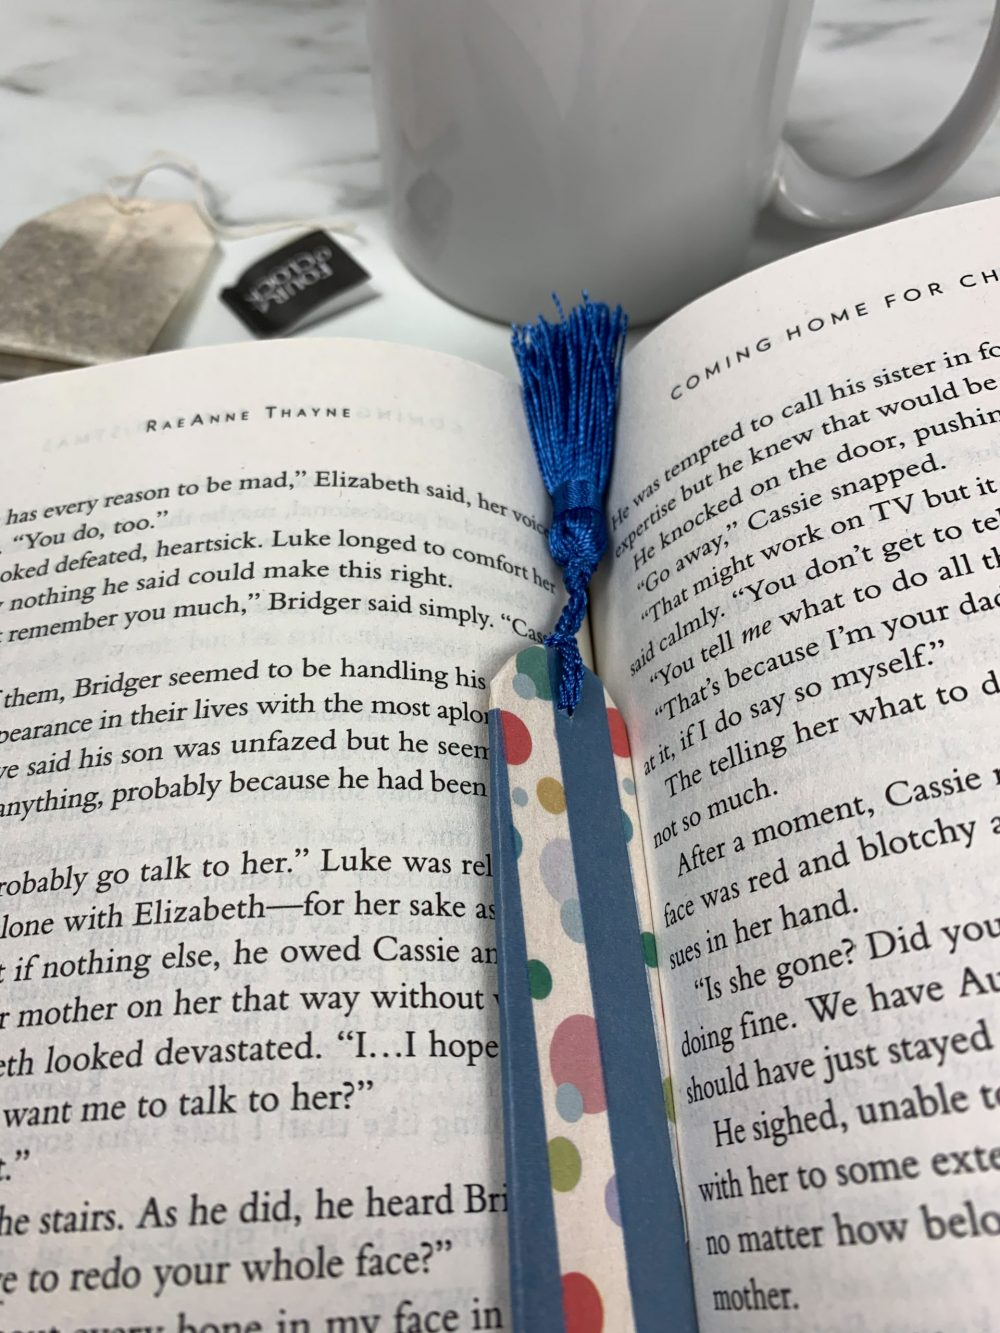
Enjoy Your New DIY Bookmarks!
You did it! Time to take a step back and admire your work. Not only have you created your very own DIY bookmarks to keep your pages fresh and crisp, but you now also have a simple homemade gift idea to give to others as well.
The next time that someone has a birthday or even a holiday gift exchange coming up, these bookmarks can be the perfect homemade gift idea.
And be ready, they’re quite addictive and fun to make. You might find yourself making plenty more of these bookmarks just to add to your collection. (I like to make a few extra to have in my purse and in my laptop bag as a “just in case” type scenario!)